Adding your email account to outlook will easily allow you to receive and store your emails, archive them, organize and keep your emails on your laptop or desktop, while deleting the emails from the sever, opening up space.
Below are the steps to take for successful installation of your email on outlook:
1- open outlook, then click on ‘File‘
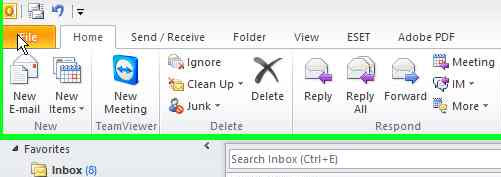
installing email on outlook step 1
2- Choose ‘Info‘ from left menu, then Account Settings > Add
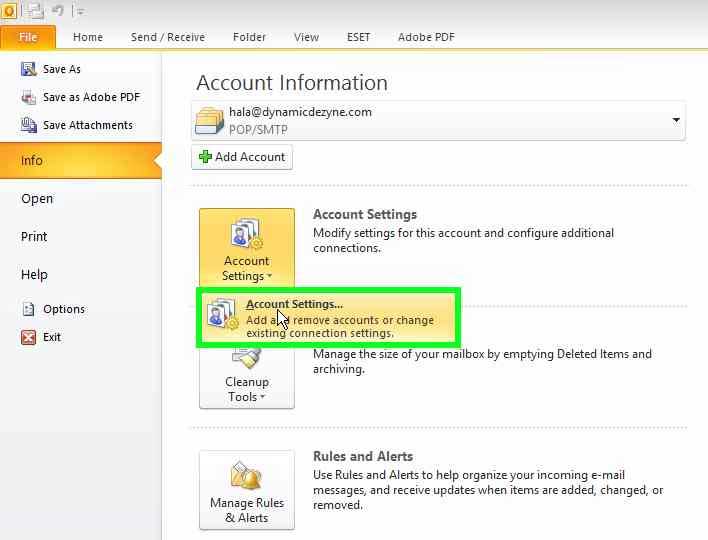
installing email on outlook step 2
3- Now click on ‘NEW‘ from top menu
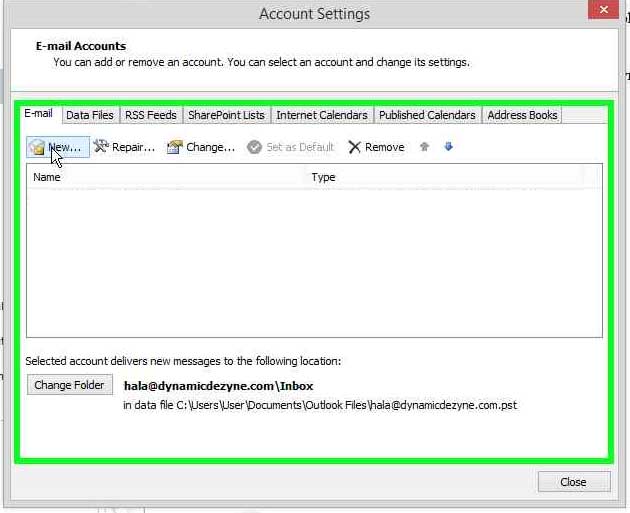
installing email on outlook step 3
4- Choose ‘manually configure server settings or additional server types’
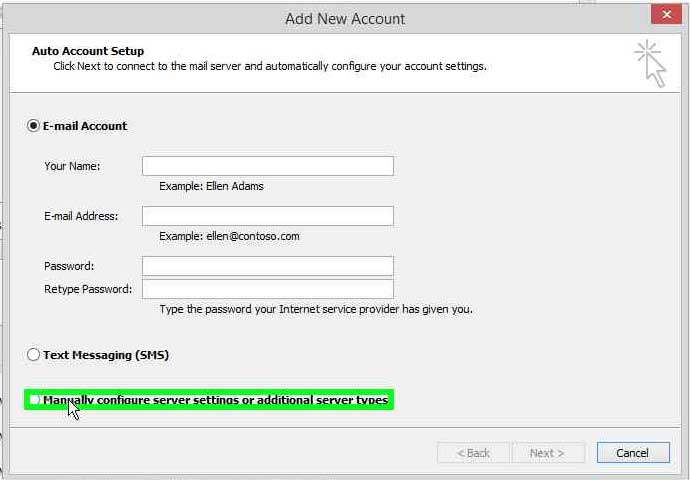
installing email on outlook step 4
5- Click Next
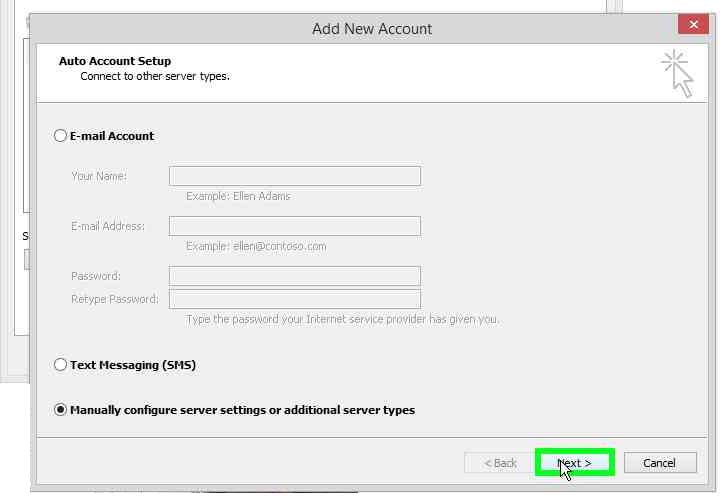
installing email on outlook step 5
6- Choose ‘Internet E-mail’ then click NEXT
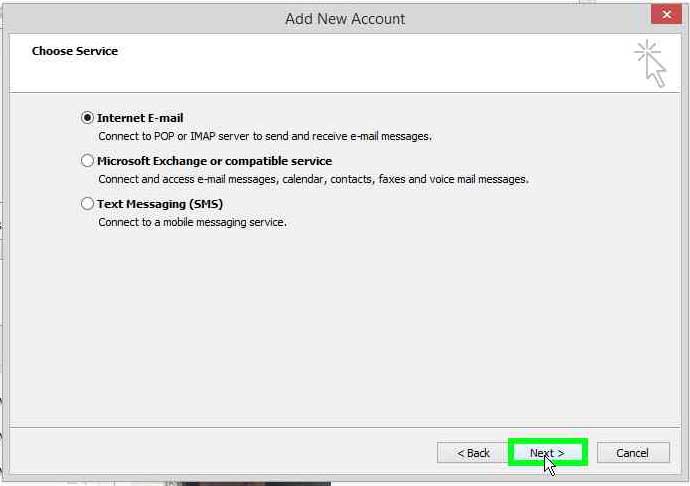
installing email on outlook step 6
7- fill in the details:
a- your full name
b- your full email
c- choose pop3
d- incoming server & outgoing server should both be mail.yourdomain.com replace yourdomain.com with the actual domain example if my domain was ddiweb.net then this would be mail.ddiweb.net
e- user name is your full email (same as the email you put in point b) above)
f- password should be the password for your email
g- select ‘remember password’
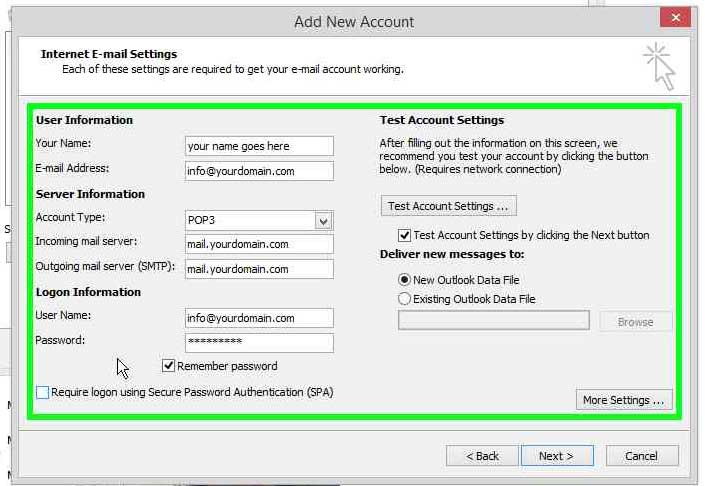
installing email on outlook step 7
8- Now click ‘More Settings’
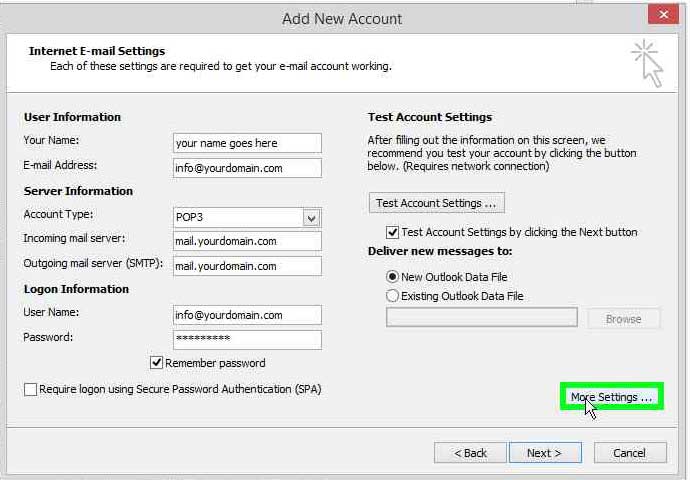
installing email on outlook step 8
9- from Top Tabs:
- click on ‘Outgoing Server‘ Tab
- Select ‘My outgoing server (SMTP) requires authentication
- Ensure that ‘use same settings as my incoming mail server’ is also selected
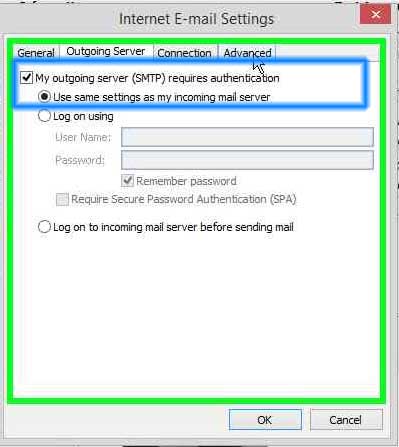
installing email on outlook step 9
10- From Top Tabs:
- Click on ‘Advanced‘ Tab
- Check that pop3 port is 110
- Change smtp port to 26
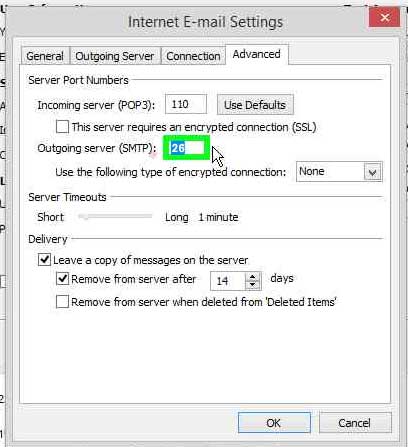
installing email on outlook step 10
11- change the remove from server after to 2 days maximum to avoid filing up your space.
2 days is long enough for you to receive your emails on your mobile and on your laptop.
This setting is for your emails to stay on the server after you have downloaded them on outlook for 2 days.
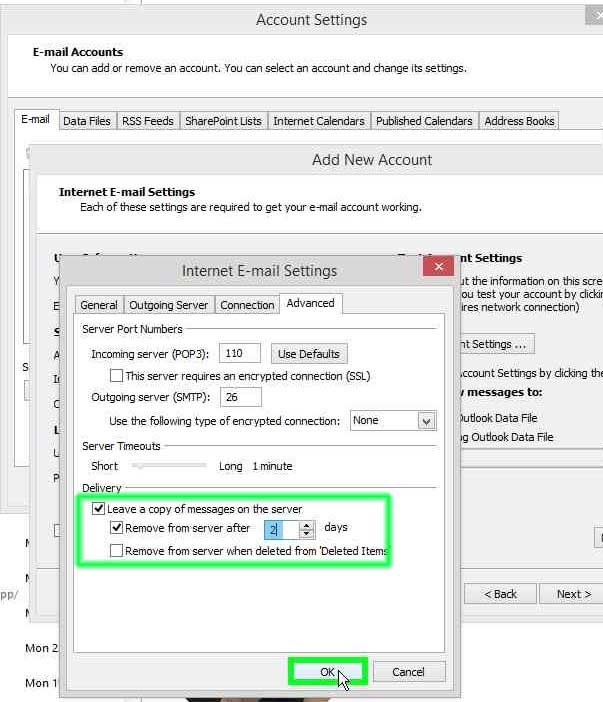
installing email on outlook step 11
12- Click NEXT and now outlook will test your settings
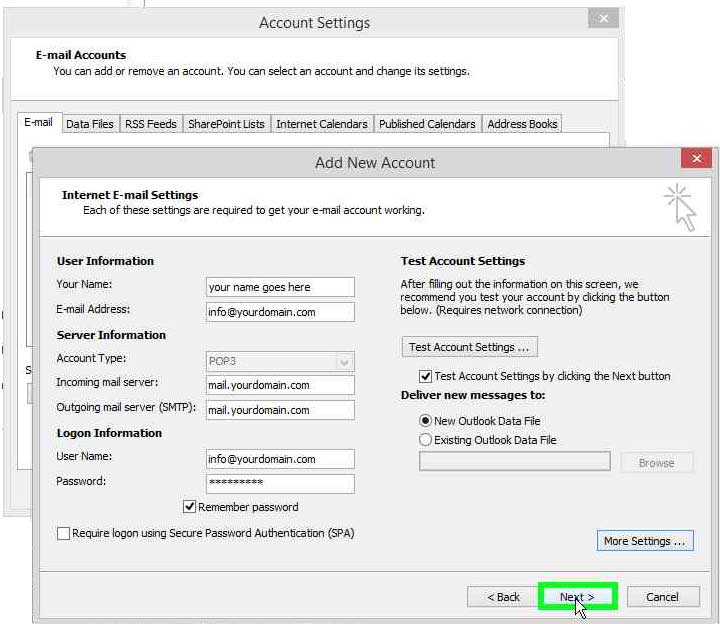
installing email on outlook step 12
13- A Test Account settings will attempt to access the mail server and test that your settings are correct, once you see the correct signs, click Close.
If the test failed, then go back and double check that you entered all the right information in steps 7- 10 and repeat the test
you could have misspelled your email, domain, or password, or perhaps added a space in the server name, or forgot to change smtp port to 26.
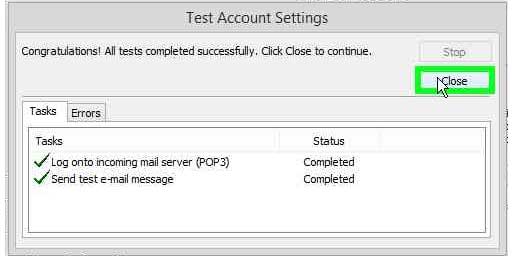
installing email on outlook step 13
14- If all is correct and the test passed, click the Finish
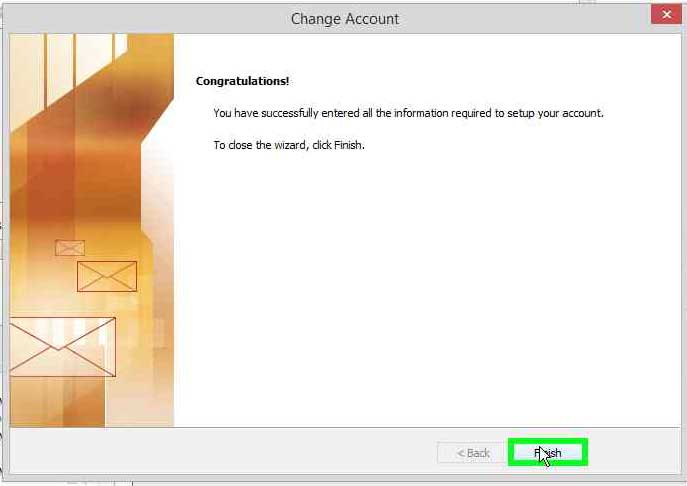
installing email on outlook step 14
15- Now you can see the new email you installed appear under emails, click Close to finish installation
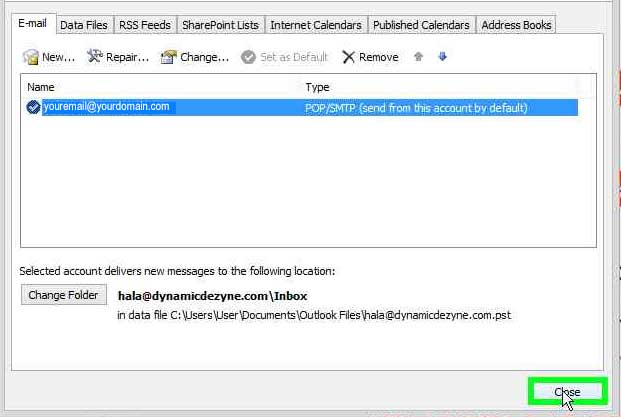
installing email on outlook step 15
16- From Top Menu of main Outlook, click ‘HOME‘ Tab then Click ‘SEND & RECEIVE’ to start receiving your emails.
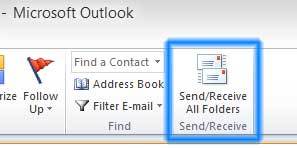
installing email on outlook step 16
